Using YADE with cloud computing on Amazon EC2
(Note: we thank Robert Caulk for preparing and sharing this guide)
Summary
This guide is intended to help YADE users migrate their simulations to Amazon Web Service (AWS) EC2. Two of the most notable benefits of using scalable cloud computing for YADE include decreased upfront cost and increased productivity. The entire process, from launching an instance, to installing YADE, to running a YADE simulation on the cloud can be executed in under 5 minutes. Once the EC2 instance is running, you can submit YADE scripts the same way you would submit jobs on a local workstation.
Launching an EC2 instance
Amazon Web Services (AWS) Console
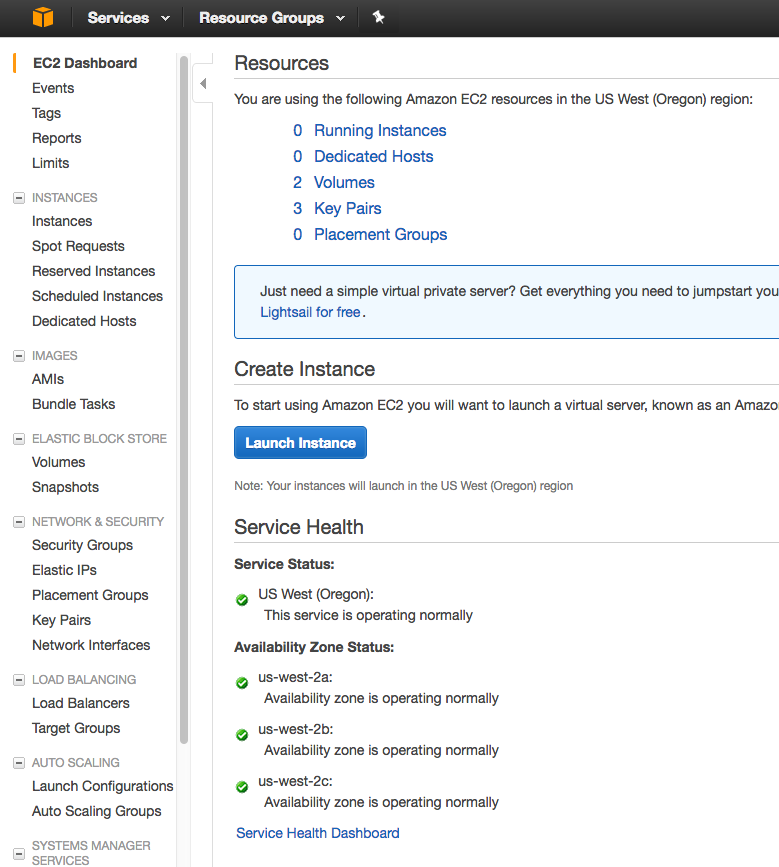
Start by signing into the console on Amazon
EC2. This will require an
existing or new Amazon account. Once you’ve signed in, you should find
the EC2 console by clicking on ‘services’ in the upper left hand corner
of the AWS homepage. Start by clicking on the launch an instance
blue button (Fig. fig-console). Select the Amazon
Machine Image (AMI): Ubuntu Server 16.04 LTS (Fig.
fig-ubuntu).

Select Ubuntu server 16.04 LTS AMI
You will now select the instance type. It is worth looking at the
specifications for each of the
instances so you can
properly select the power you need for you YADE simulation. This
document will not go into detail in the selection of size, but you can
find plenty of YADE specific performance
reports that
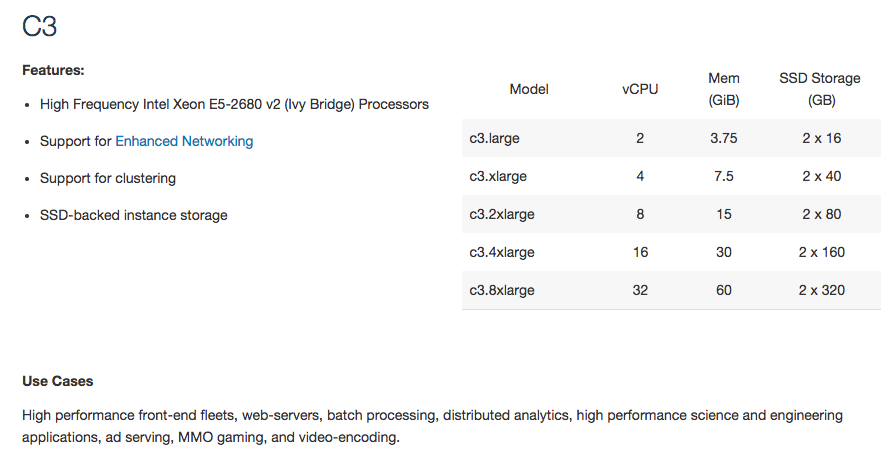
will help you decide. However, the instance type is an important
selection. The Compute Optimized instances are necessary for most
YADE simulations because they provide access to high performing
processors and guaranteed computing power. The C3.2xlarge (Fig.
fig-type) is equivalent to an 8 core 2.8ghz Xeon E5
with 25 mb of cache, which is likely the best option for medium-large
scale YADE simulations.
Compute optimized (C3) instance tier
Before launching, you will be asked to select an existing key pair
or create a new key pair. Create a new one, download it, and place it
in a folder that you know the path to. Modify the permissions on the
file by navigating to the same directory in the terminal and typing:
chmod 400 KeyPair.pem
Now the instance is launched, you will need to connect to it via SSH. On unix systems this is as easy as typing:
ssh -i path/to/KeyPair.pem ubuntu@ec2-XX-XXX-XX-XX.us-west-2.compute.amazon.com
into the terminal. There are other options such as using PuTTY, or even
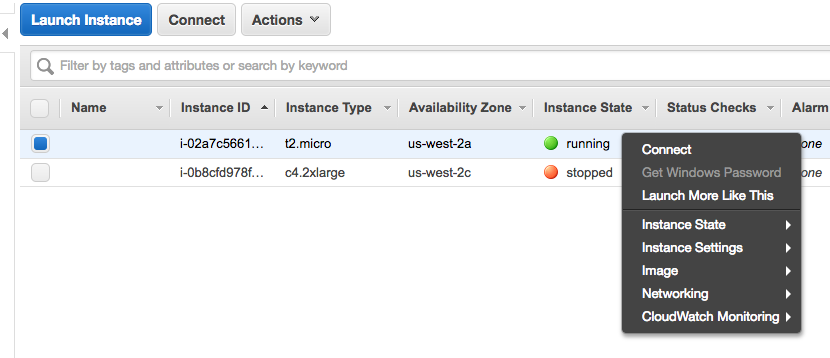
a java based terminal on the AWS website. You can find the necessary
information by navigating to Instances in the left menu of the AWS
console. Right click on the instance as shown in Fig.
fig-connect and click connect.
Connecting to the instance
You will be presented with the public DNS, which should look something like Fig. fig-dns.

Public DNS
Installing YADE and managing files
After you’ve connected to the instance through SSH, you will need to install YADE. The following commands should be issued to install yadedaily, python, and some other useful tools:
#install yadedaily
sudo bash -c 'echo "deb http://www.yade-dem.org/packages/ xenial/" >> /etc/apt/sources.list'
wget -O - http://www.yade-dem.org/packages/yadedev_pub.gpg | sudo apt-key add -
sudo apt-get update
sudo apt-get install -y yadedaily

# install python
sudo apt-get -y install python
sudo apt-get -y install python-pip python-dev build-essential

# install htop
sudo apt-get -y install htop
Note that ..packages/ xenial/ should match the Ubuntu
distribution. 16.04 LTS is Xenial, but if you chose to start Ubuntu
14.04, you will need to change ‘xenial’ to ‘trusty’.
Finally, you will need to upload the necessary YADE files. If you have a
folder with the contents of your simulation titled yadeSimulation
you can upload the folder and its contents by issuing the following
command:
scp -r -i path/to/KeyYADEbox.pem path/to/yadeSimulation ubuntu@ec2-XX-XXX-XX-XX.us-west-2.compute.amazonaws.com:~/yadeSimulation
You should now be able to run your simulation by changing to the proper directory and typing:
yadedaily nameOfSimulation.py
In order to retrieve the output files (folder titled ‘out’ below) for post processing purposes, you will use the same command that you used to upload the folder, but the remote and local file destinations should be reversed:
scp -r -i path/to/KeyYADEbox.pem ubuntu@ec2-XX-XXX-XX-XX.us-west-2.compute.amazonaws.com:~/yadeSimulation/out/ path/to/yadeSimulation/out
Plotting output in the terminal
One of the main issues encountered with cloud computing is the lack of graphical feedback. There is an easy solution for graphically checking the status of your simulations which makes use of gnuplot’s wonderful ‘terminal dumb’ feature. Any data can be easily plotted by navigating to the subfolder where the simulation is saving its output and typing:
gnuplot
set terminal dumb
plot ``data.txt" using 1:2 with lines
Where ‘1:2’ refers to the columns in data.txt that you wish to plot against one another. Your output should look something like this:
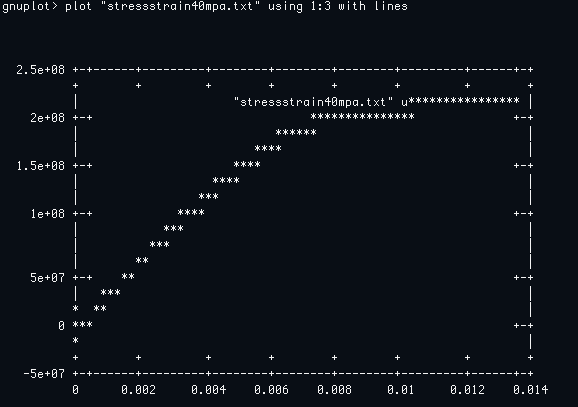
Gnuplot output
Comments
Amazon AWS allows you to stop your instance and restart it again later with the same files and package installations. If you wish to create several instances that all contain the same installation and file directory you can create a snapshot of your default image which you will be able to use to create various volumes that you can attach to new instances. These actions are all performed very easily and graphically through the EC2 console
You can use Spot Instances, which are a special type of instance that allow you to bid on unused servers. The price is heavily discounted and worth looking into for any YADE user that wishes to run hundreds of hours of simulations.
For most simulations, your computational efficiency will decrease if you use above 8 cores per simulation. It is preferable to use yadedaily-batch to distribute your cores accordingly so that you always dedicate 8 cores to each simulation and ensure 100% of the processor is running.
Create a tmux session to avoid ending YADE simulations upon disconnecting from the server.